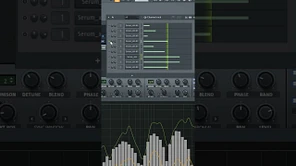
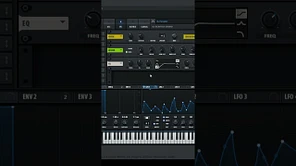
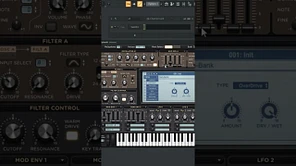
I found a way to get a sweep down effects right in Sylenth1, and I’m excited to walk you through it.
This effect isn’t about being flashy; it’s about adding a subtle transition that guides the listener’s ear. Think of it as the audio equivalent of a friendly nudge, saying, “Hey, something new is coming up.”
In this tutorial, we’ll build this from the ground up, using settings that I’ve come to rely on through trial and error. We’ll cover everything from the oscillator to effects, and I’ll share a few blunders I made along the way so you can avoid them. By the end, you’ll have a preset you can use right away, and I’ll point you to where you can grab it for your own projects. So, fire up Sylenth1, and let’s get started.
Step 1: Getting the Oscillator to Sing with Noise Shape and Detune
First things first, we need to set the foundation with the oscillator. In Sylenth1, you’ll want to use the Noise shape oscillator for this effect. Why? Because it gives us that textured, airy sound that works wonders for sweeps. I recall once using a basic sine wave instead, and it ended up sounding thin and weak, almost like a mosquito buzzing in your ear—not the epic sweep I was going for. So, let’s avoid that.
Set the oscillator to Noise shape, and then bump up the voices to 8. This adds richness and thickness, making the sweep feel full and present. Next, adjust the detune to 6.3. Detune might sound fancy, but it’s simply a way to make the sound wobble a bit by slightly tuning some voices differently. It’s like when a choir sings slightly out of sync, creating a warm, shimmering effect. I once set the detune too high, and it turned into a messy, out-of-tune mess that made my ears hurt. So, 6.3 is a sweet spot that adds character without going overboard.
Step 2: Shaping the Sound with a Bandpass Filter
Now, let’s move to the filter section. Filters are like the sculptors of sound—they carve out the frequencies you want to highlight or hide. For our sweep down, we’re using a bandpass filter. This type lets through a specific range of frequencies, which is great for creating that focused, sweeping motion. Set the cutoff to 5.7 and the resonance to 2.6. The cutoff controls where the filter starts to work, and resonance adds a bit of emphasis around that point, giving it a slight ring.
I learned the hard way that setting the resonance too high can make the sound whistle like a tea kettle. So, 2.6 gives us a nice balance, adding definition without the piercing peaks. This combination will help the sweep feel controlled and smooth as it moves downward.
Step 3: Fine-Tuning with Filter Control and Warm Drive
After setting the basic filter, we need to add some movement using the filter controls. This is where we make the sweep actually happen. Adjust the filter cutoff to 4.6 and the resonance to 3.3. These settings work with the previous ones to create a dynamic change over time. Imagine you’re turning a dial slowly—it’s that gradual shift that makes the sweep effective.
Also, turn on the warm drive. This adds a bit of saturation and grit, making the sound feel more analog and lived-in. It’s like adding a dash of hot sauce to your meal; it perks things up without overwhelming the flavor. I remember forgetting to enable this once, and the sweep sounded too clean and digital, almost as if it came from a cheap keyboard. With warm drive on, it gains that extra punch that sits well in a mix.
Step 4: Boosting the Lows and Highs with EQ
Next up, we’ll use the equalizer to shape the tone further. EQ is your best friend for making sounds fit together, kind of like arranging furniture in a room so everything has its place. Set the bass to 9.2 dB at 564 Hz. This gives the lower end a solid presence, adding weight to the sweep so it doesn’t disappear when the bass drops. Then, set the treble to 10 dB at 16 kHz. This brightens up the high end, making it sparkle and cut through the mix.
Just be careful not to overdo it; too much bass can make it muddy, and too much treble can sound harsh. These settings are a good starting point that I’ve found reliable.
Step 5: Adding Space with Reverb
Reverb is essential for giving the sweep a sense of space and depth. Without it, the sound can feel dry and stuck in one spot. Set the reverb to 58%, and make sure the tail is turned off or set very short. We don’t want a long, trailing reverb here because that could clutter the mix. Instead, we’re aiming for a subtle room feel that makes the sweep blend in naturally.
Leaving the reverb tail too long once makes it sounded like the sweep was falling down a well, and it never ended! So, 58% with no tail keeps it tight and effective. Think of it as adding a quick echo in a small hall, just enough to give it body without taking over.
Step 6: Strengthening the Sound with Compression
Finally, we’ll add compression to give the sweep more strength and consistency. Compression evens out the dynamics, making the quiet parts louder and the loud parts controlled. It’s like having a gentle hand on the volume knob, ensuring everything stays balanced. Adjust the compressor to add a bit of punch—this will make the sweep stand out without peaking.
Without it, sweeps would sometimes get lost in the mix or poke out too much. With compression, they sit right where they should, adding that professional touch.
Wrapping It Up and Grabbing Your Preset
And there you have it—a step-by-step guide to creating a sweep down effect in Sylenth1 that’s smooth, powerful, and ready to elevate your music. We’ve covered everything from the oscillator to effects, and I hope my little stories of mishaps and discoveries made the process more relatable. Remember, music production is all about experimentation, so feel free to tweak these settings to match your style.
If you’d rather skip the setup and get straight to using this sound, I’ve put together a preset based on these steps. You can download it from HERE and load it into Sylenth1 to hear it in action. It’s a great starting point for your own tracks, and I’m sure you’ll find plenty of ways to make it your own.
I’d love to hear how you use this effect in your music—drop me a line sometime and share your creations.


